Star Granny Square Crochet Pattern — Free Beginner Tutorial
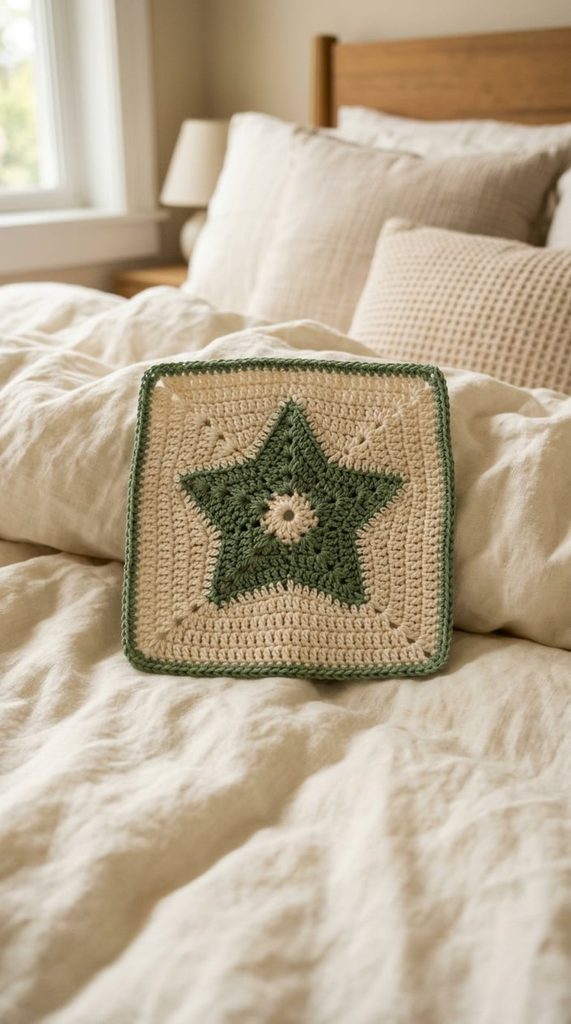
This star granny square combines a delicate five-pointed star motif with the classic granny square structure you already know. The star points are shaped using nothing more than basic stitches worked at different heights — no fancy techniques required — which makes this a great next project once you’re comfortable with a basic granny square.
Why This Pattern Works
The star shape comes together using a clever trick: working single crochet, half double crochet, double crochet, and treble crochet stitches all into the same short chain creates a triangle that naturally tapers to a point. Repeat that same triangle five times around a center ring, and you get a five-pointed star — no counting increases or decreases the way you might expect. Once the star is formed, the remaining rounds simply build it out into a standard granny square shape.
Skill Level & Pattern Notes
- Skill level: Beginner-friendly (comfortable with basic stitches recommended)
- Written in US crochet terms
- Finished star size: approximately 3 in (7.5 cm) wide
- Finished square size: approximately 4.3 in (11 cm) wide
- Hook: 4.00 mm (US G), adjust based on your yarn weight
Materials Needed
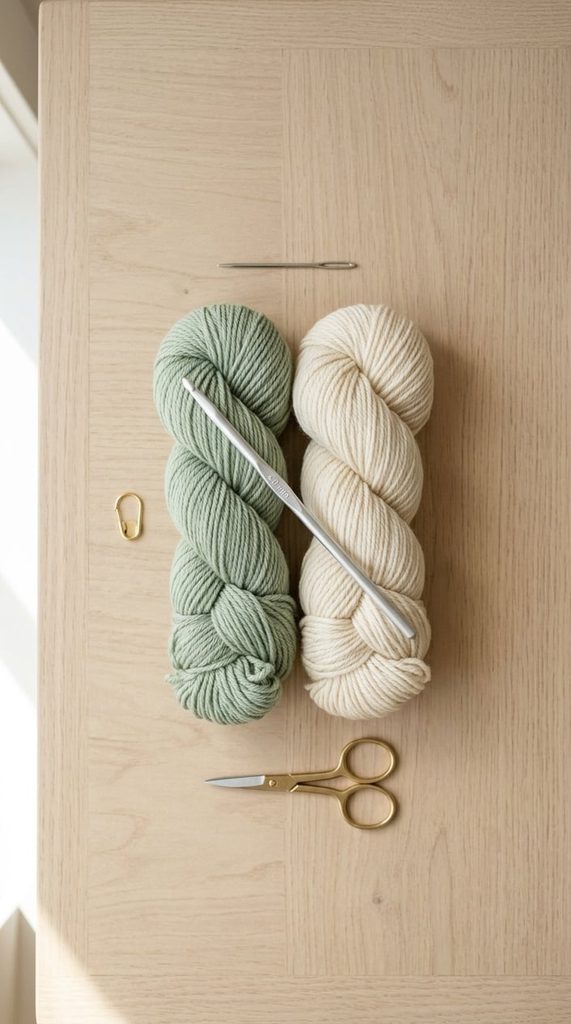
- Worsted weight (#4) yarn in 2 colors — a star color and a background color
- 4.00 mm (US G) crochet hook
- Yarn needle
- Stitch marker
- Scissors
Yarn tip: This pattern also works beautifully in lighter yarn weights if you’d like a smaller, more delicate square — a size 3 (light) yarn with a 3.00 mm hook produces a neat, tightly defined star with crisp points, great for coasters or smaller projects.
Abbreviations
| Abbreviation | Meaning |
|---|---|
| ch(s) | chain(s) |
| dc | double crochet |
| hdc | half double crochet |
| sc | single crochet |
| sl st | slip stitch |
| tr | treble crochet |
| sk | skip |
| st(s) | stitch(es) |
| rep | repeat |
| ( ) | repeat the instructions inside parentheses as directed |
| [ ] | stitch count at the end of a round |
Before You Start
Note: The starting chain at the beginning of each round does NOT count as a stitch in this pattern. Keep this in mind as you count your stitches at the end of each round.
Tip: Use a stitch marker to mark the first stitch of each round. Because several rounds in this pattern don’t join with an obvious visual marker, this one habit will save you from losing your place.
Step 1: Make the Center Ring
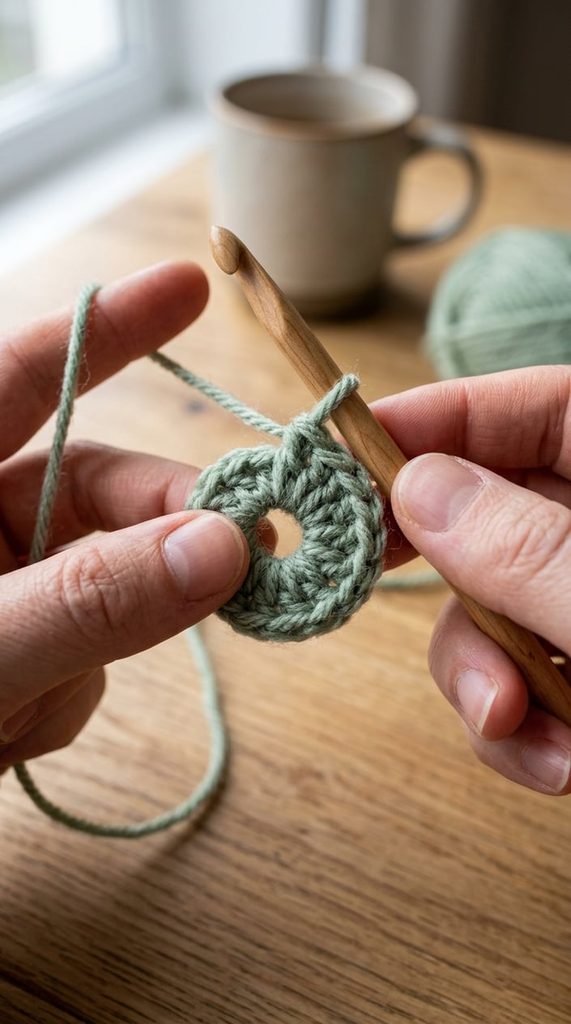
With your star color, make a magic ring (or chain 4 and slip stitch into the first chain to form a ring).
Round 1: Ch 2, work 10 dc into the ring, sl st to join to the top of your starting ch-2. (10 sts)
Pull the tail of your magic ring snug to close the small gap in the center so your star lies flat.
Step 2: Shape the Star Points
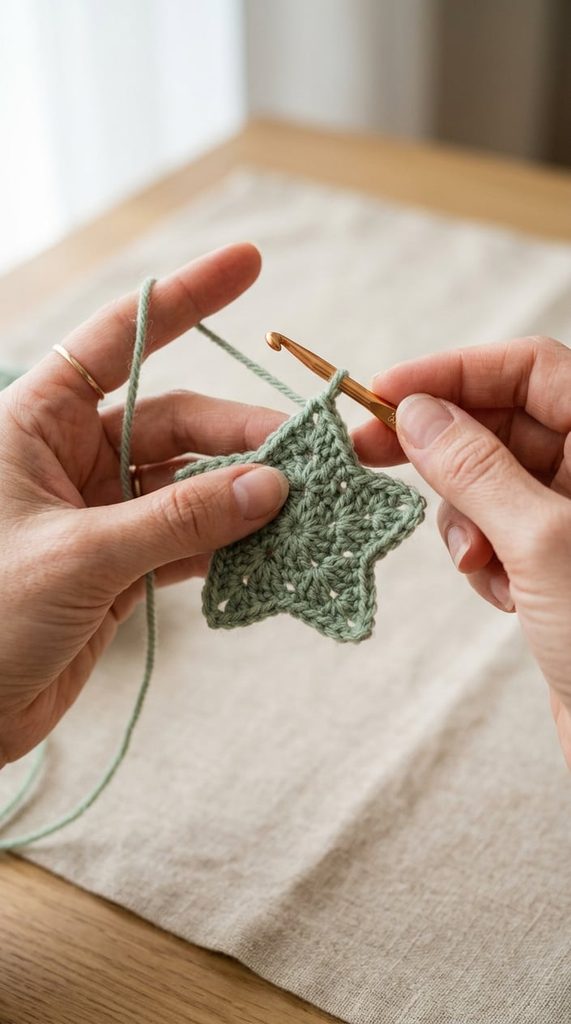
This is the step that creates the star shape — take it slowly the first time through.
Round 2: Ch 5, sc into the 2nd chain from your hook, hdc into the next chain, dc into the next chain, tr into the next chain, skip the next 2 stitches, sl st into the following stitch. Repeat from * around 4 more times (5 times total). Sl st to join to your very first stitch. (5 star points)
Important: Each repeat of this sequence builds one triangle-shaped point, tapering from a single chain at the tip down to a wider base. Working sc, hdc, dc, then tr into the same short chain is what creates that gradual taper — shorter stitches at the point, taller stitches at the base.
At this point, you should have a small 5-pointed star. Fasten off your star color.
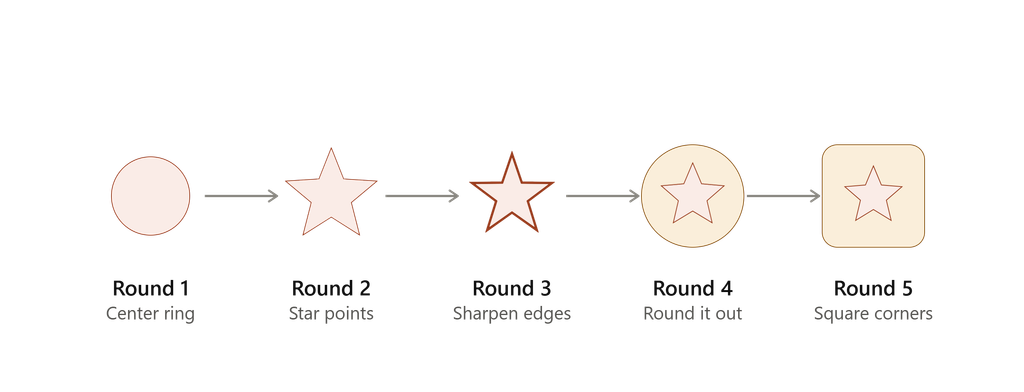
Step 3: Sharpen the Star Points
This round adds definition and crisp edges to your star before we round it out.
Attach your background color into the top of any stitch from Round 2.
Round 3: Ch 1, sc into the same stitch, dc into the next stitch, tr into the next stitch, sc into the next stitch — this builds one section along the edge of a star point. Repeat this sequence 5 times around, following the outline of each point. Sl st to join.
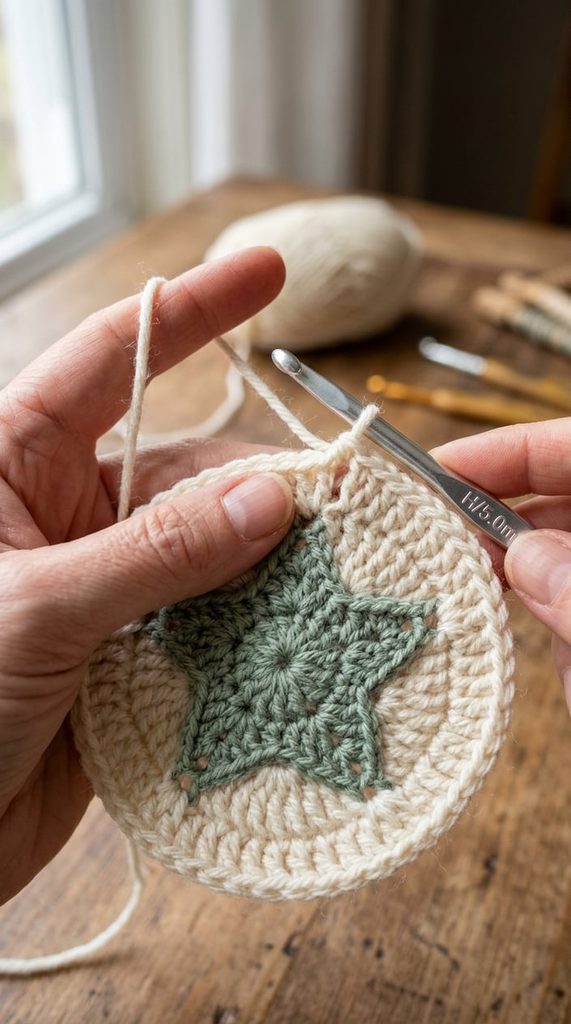
Tip: If you’d like even crisper star points, work this round into the back loops only (BLO) of the stitches below. This pulls the star tighter and makes the points stand out more sharply against the background color.
Step 4: Round Out the Star
Now we’ll build out from the star’s points to start forming a rounded shape, which will become the base for squaring off in the next step.
Round 4: Ch 1, sc into the same stitch. Work (dc, tr, [tr, ch 2, tr] into the next stitch, tr, dc) into the space between star points, then sc into the top of the next star point. Repeat around 4 more times. Sl st to join.
You should now have a rounded shape with your star clearly visible in the center, surrounded by a soft, scalloped edge.
Step 5: Turn the Circle Into a Square
This final round is what transforms your rounded star motif into a proper granny square with four corners.
Note: The first stitch of this round is worked into the stitch at the base of your starting chain — the same technique used in Round 4.
Round 5: Ch 2, work dc into each stitch across to the next ch-2 corner space, then work (2 dc, ch 2, 2 dc) into that corner space. Repeat this around all 4 corners. Sl st to join to the top of your starting ch-2.
Fasten off and weave in your ends.
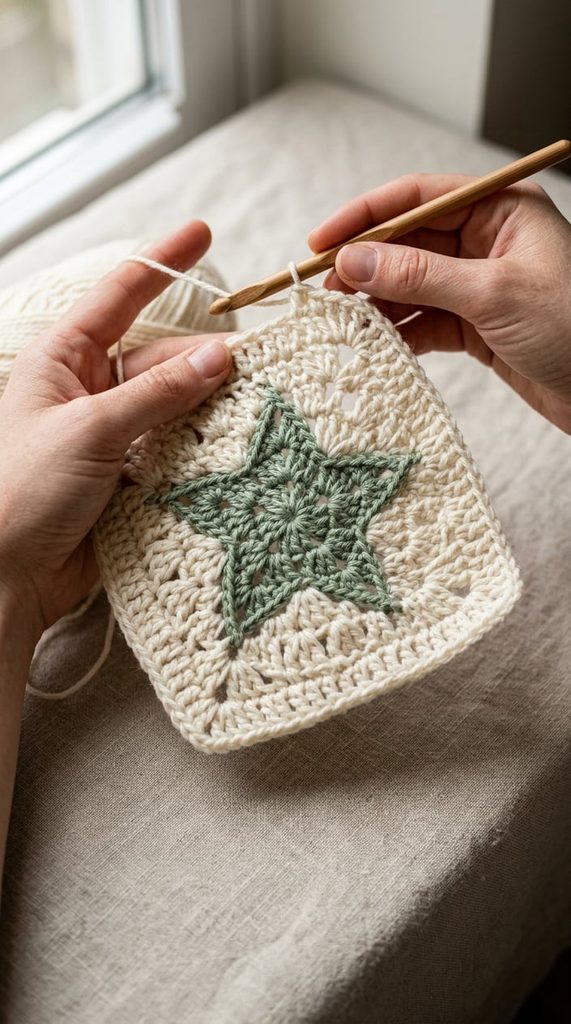
Finished Star Granny Square
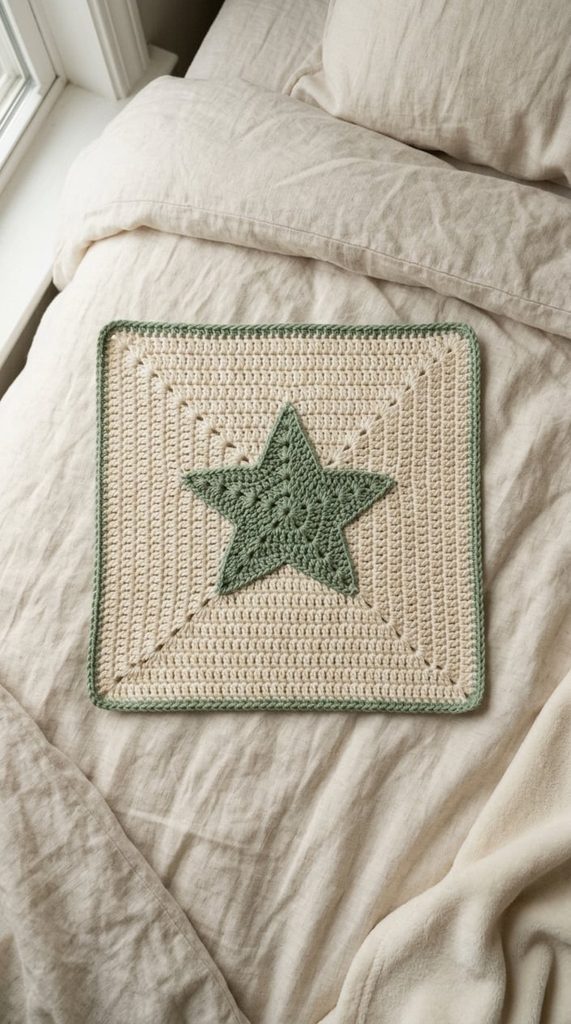
Your square is now complete! Give it a gentle block if you’d like the edges to lie extra flat, especially if you’re planning to join several squares together into a blanket or bag.
Color Palette Ideas
The star motif looks different depending on your color choice — here are a few directions to try:
- Sage green star on ivory — soft, natural, and pairs well with neutral home decor (shown in this pattern)
- Deep navy star on warm gold — a celestial, night-sky feel, great for a starry-themed blanket
- Rust orange star on cream — a cozy, autumn-inspired combination
- Dusty rose star on soft gray — a gentle, romantic pairing that matches nursery or baby-blanket projects
Tip: Since this square uses just 2 colors, it’s an excellent scrap-yarn project. Leftover yarn from other blanket patterns in this cluster works perfectly here.
Caring for Your Star Granny Squares
If you’re using these squares in a finished project like a blanket or bag, a little care goes a long way in keeping the star shape crisp:
- Washing: Hand wash in cool water with a gentle detergent. Press gently rather than wringing or twisting the fabric.
- Drying: Lay flat on a clean towel to dry, gently reshaping the square while it’s still damp. Avoid hanging, which can stretch the stitches out of shape.
- Storage: Store folded in a breathable fabric bag rather than plastic, which can trap moisture.
- Sunlight: Keep finished projects out of direct sunlight when possible to prevent the colors from fading over time.
Frequently Asked Questions
Is this star granny square pattern good for beginners?
Yes. While the star shape looks intricate, every stitch used is a basic stitch (sc, hdc, dc, tr) — there are no special or compound stitches involved. If you’re comfortable working basic stitches at different heights into the same stitch or space, you can make this pattern.
Why does my star look uneven or lopsided?
This is almost always caused by a missed count in Round 2. Each of the 5 point-shaping sequences needs the same number of chains and stitches — if one point comes out shorter or longer than the others, double-check that you chained 5 and skipped exactly 2 stitches at the base of each point before working the connecting slip stitch.
Can I make this square a different size?
Yes. Switching to a lighter or heavier yarn weight with a matching hook size will scale the entire square up or down proportionally. A size 3 (light) yarn with a 3.00 mm hook creates a smaller, more delicate square, while a bulkier yarn with a larger hook will produce a bigger square with the same proportions.
How many squares do I need for a blanket?
This depends on your desired blanket size and how you plan to arrange the squares. Check our [Crochet Blanket Sizes Chart] for common blanket dimensions and how many squares you’ll need at this pattern’s approximate 4.3 in finished size.
Can I use more than 2 colors?
Absolutely. While this pattern is written with 2 colors (a star color and a background color), you could work Round 3 or Round 4 in a third accent color for extra dimension, similar to how the Sunburst Granny Square pattern uses color transitions between rounds.